Marketing
How to Add a Facebook Comments Section to your WordPress Website
3 min read
Marketing
Facebook comments can be installed on your blog posts and any other pages on your WordPress website. It allows your website visitors to quickly and easily post comments, questions and other insights which will increase blog engagement. Comments can also be used to identify ideas on how to optimise your blog posts or discover what new blog topics could be useful for your audience.
So let’s get straight into how you can add a Facebook comments section to your website and blog, specifically for WordPress sites, using a plugin. We estimate it will take about 10-20 minutes to complete this task.
Log in to your WordPress dashboard, go to Plugins > Add New. In the search field located in the top right of the dashboard search for “facebook comments”. Choose the “Facebook Comments” plugin and install, then activate it.

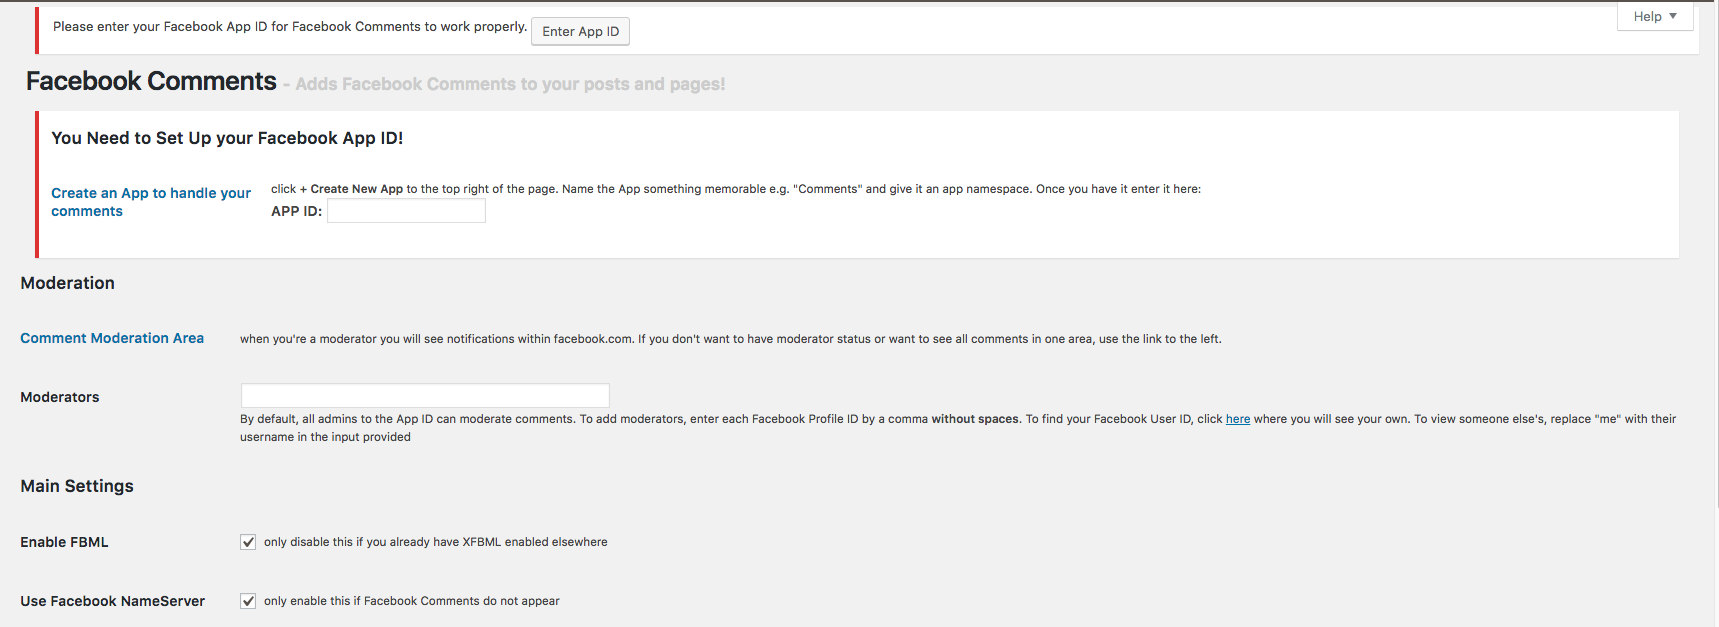
Next up, once your on the application settings screen, click on the “Create an App to handle your comments” link to communicate with Facebook.
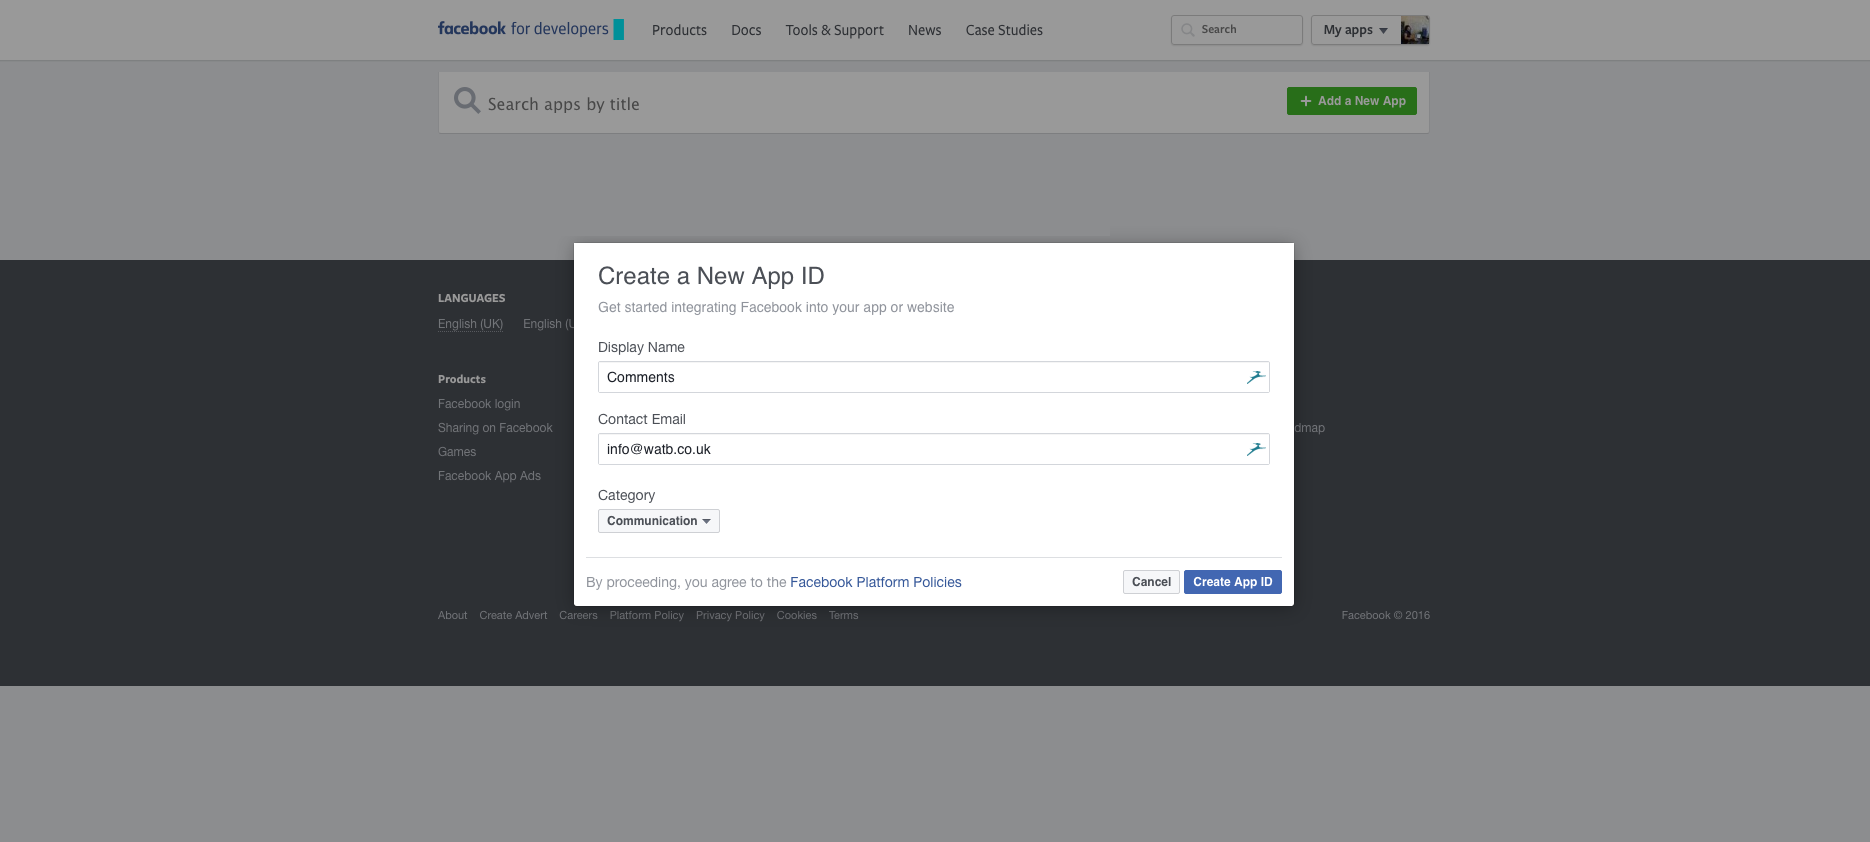
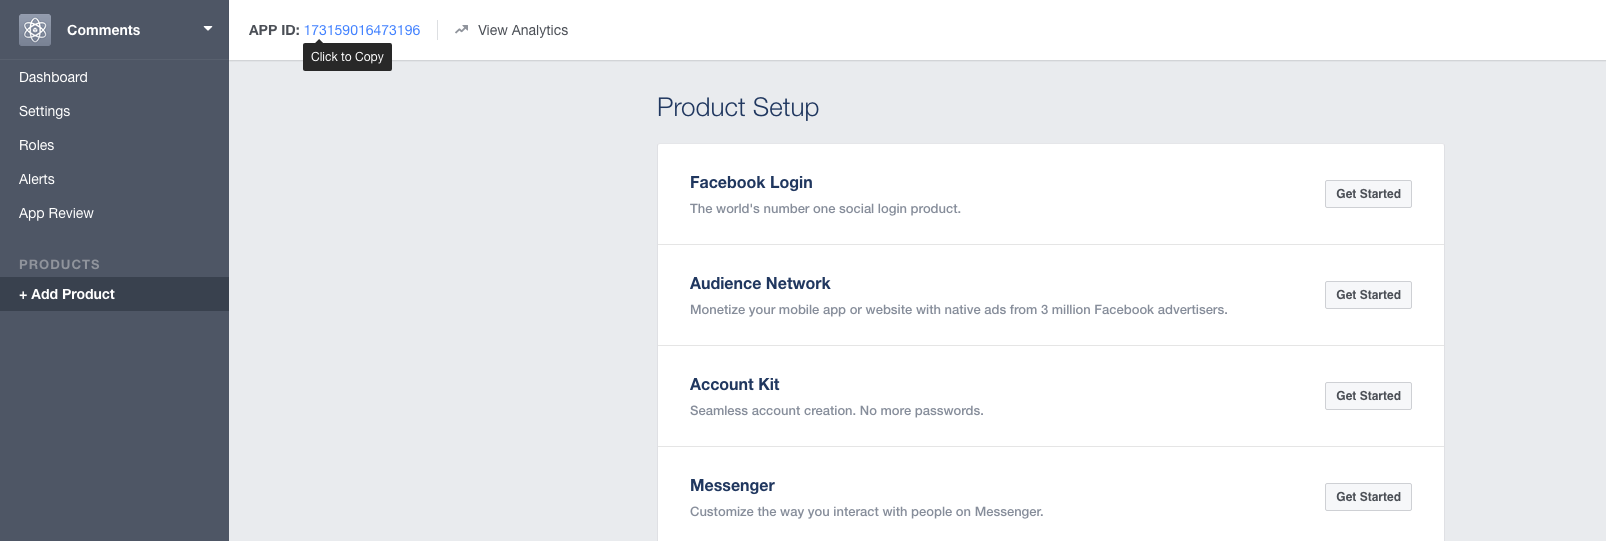
You’ll be directed to developers.facebook.com, from here click the green “Add a New App” button and fill in the relevant details. Now you will have your App ID.
Copy and paste your App ID into the plugin. Check where this is in the screenshot below.
Once you’ve pasted in your ID (as below), you can then choose where you want comments to be enabled. Typically, if you only wanted a comments section on your posts, you would only tick “Singular Posts“. Once you’ve chosen your settings, hit save.

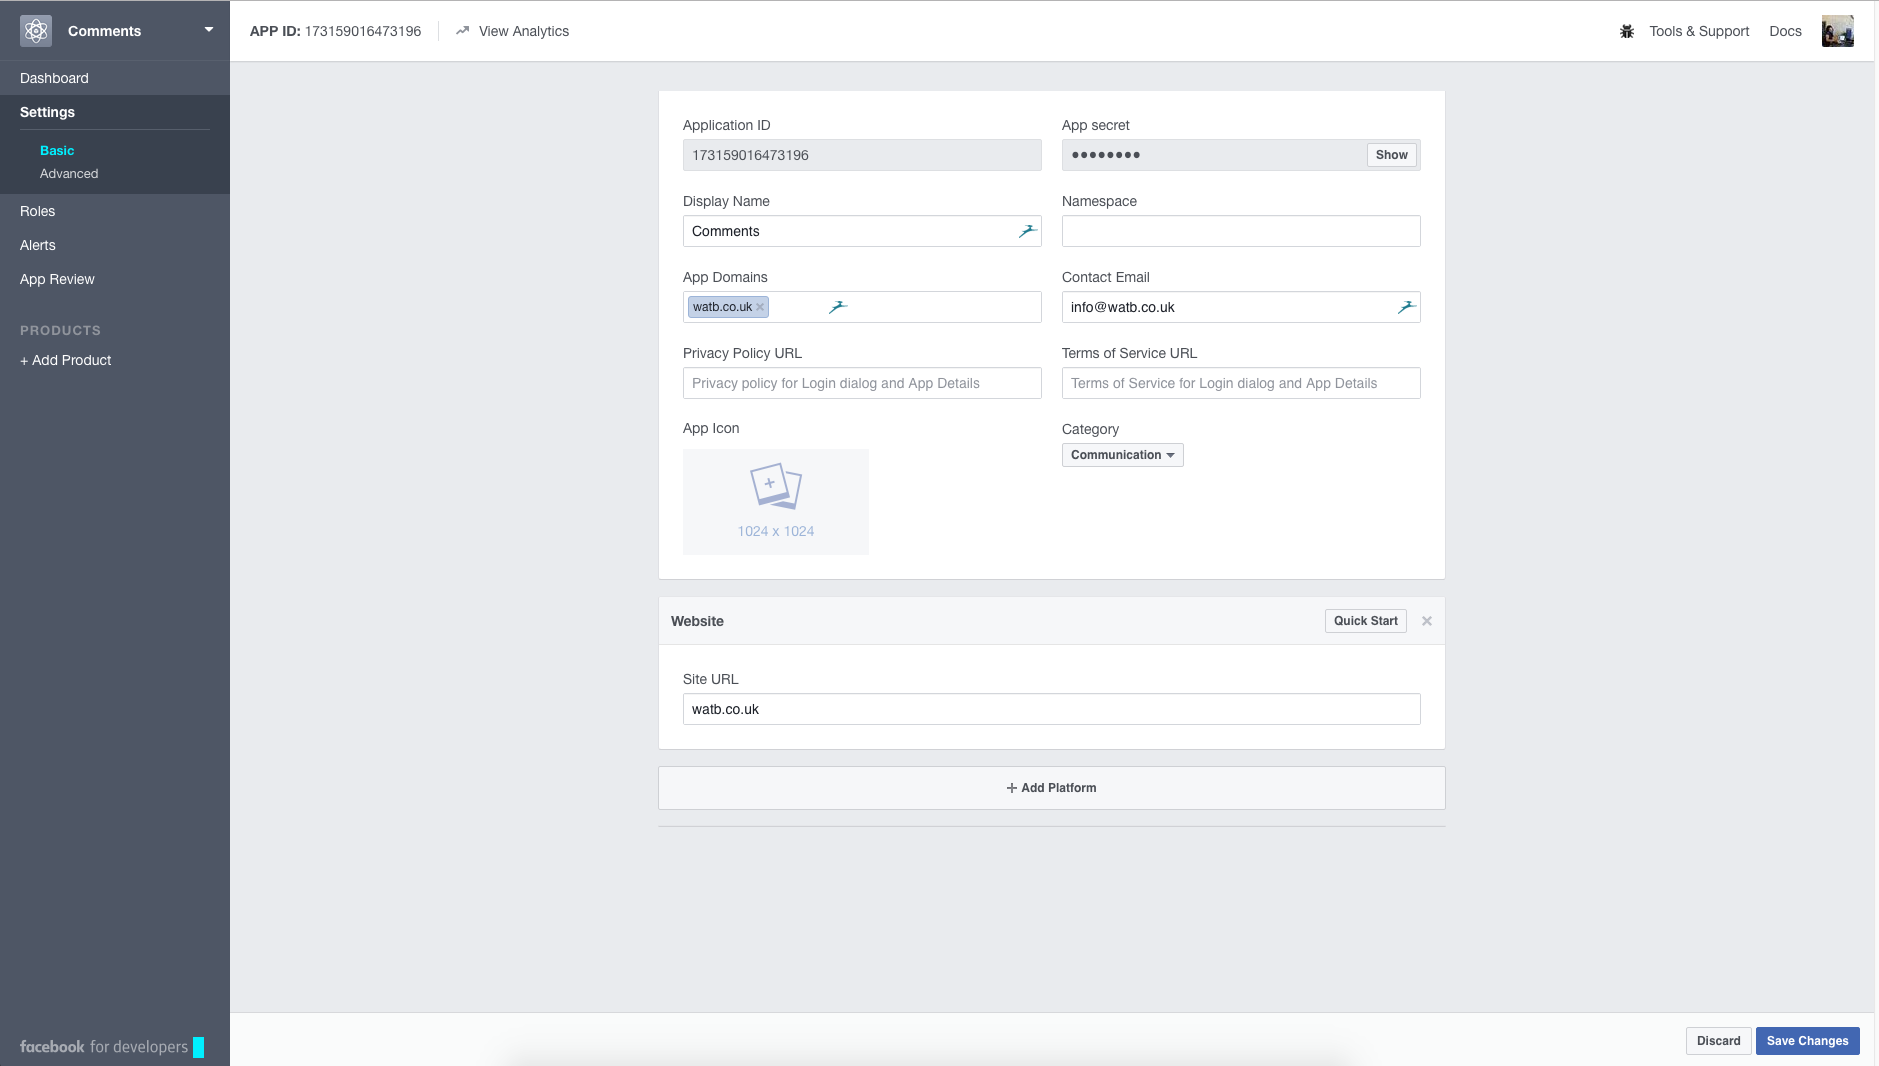
Where not quite there yet, to get up and running fully you’ll need to let Facebook know where you intend to use their app. Go back to the Facebook developer tools interface, select: App Setup > Settings > Add Platform > Basic > Website.
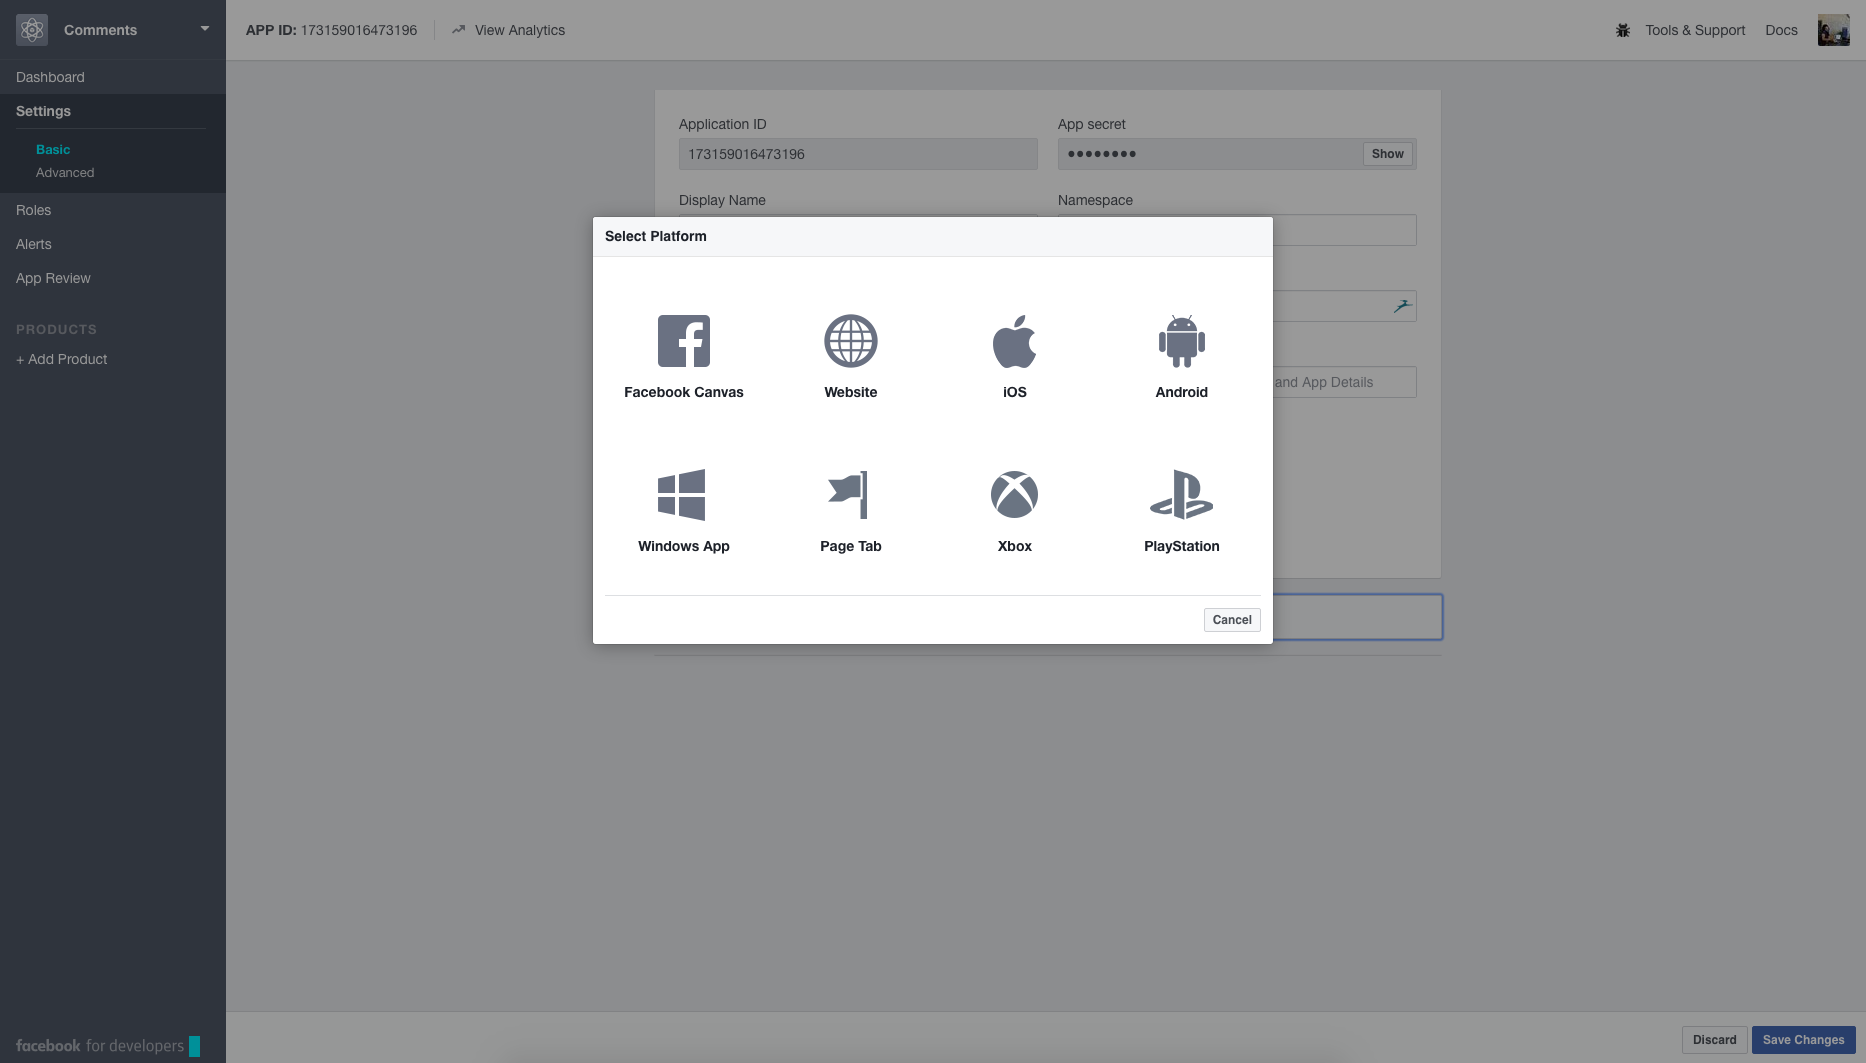
Make sure the details you input match up with the plugin details, save the changes and you are good to go.
You should now be able to see the Facebook comments section on your site. All comments are able to be moderated to keep those spammers at bay and there are a few more different settings in the Facebook Comments plugin which may be of interest, so it’s worth having a look around once set up.
Hopefully, that works for you but if you do have any problems please leave a question in our Facebook comments section below. Don’t forget to subscribe to our newsletter for more tips and tricks!


Stay up to date with the latest marketing, web design, and branding tips and news.